VMware vCenter Server Appliance Eliminates the Need for Windows Server
In the past, vCenter required a Windows server as part of the system requirements. As of VMware vCenter 5.0, VMware has a second option for the vCenter Server. They have created a VMware vCenter Virtual Appliance that can be installed by deploying a VMware OVF template. This is excellent news because it eliminates the need for an additional windows license just to run your vCenter. Even better news is that the issues that I used to experience when installing the 5.0 VMware vCenter Server Appliance have been completely resolved and the 5.1 Update 1b version installs and works marvelously.
Click here to learn more about the VMware vSphere 5 Essentials Bundle
While I don’t believe that the vCenter appliance is something that should be used in a large VMware environment quite yet, it does work perfectly fine in all of my VMware vSphere Essentials Systems. Yesterday, I setup a new VMware vCenter virtual appliance. This time using 5.1.0 Update 1b and I took a few notes to share here.

Step 1 – Download the OVA from VMware
Before you can Install VMware vCenter Server Appliance 5.1, you need to download the OVA files from VMware’s website. I got my OVA template files at this link: https://my.vmware.com/web/vmware/info/slug/datacenter_cloud_infrastructure/vmware_vsphere/5_1. There are four files that you need to download in order to deploy the OVA template:

Install VMware vCenter Server Appliance – Download VMware vCenter Appliance OVF and Template Files
- a
- Download VMware vCenter Appliance
Choose the vSphere download page. then choose VMware vCenter Server 5.1 Update 1b and modules.
Step 2 – Deploy the OVF File

Deploy vCenter OVF File
Login in with your vSphere console to the esxi host that you wish to run the vCenter Appliance virtual machine on. From the vSphere console menu choose “Deploy OVF Template…” from the file menu.

Locate the VMware vCenter Virtual Appliance OVF Template File
Locate the vCenter appliance OVF template file that you downloaded in step 1 above, then Click Next.

Review the VMware vCenter Virtual Appliance OVF Template Deployment
Review the details of the OVF template.

Name the VMware vCenter OVF Template
Name the Virtual Machine that we are deploying the OVF template into.

Select a Datastore for the VMware vCenter OVF Template Virtual Machine
Choose the datastore on which you want to store the virtual machine.

Select Thin Provision for the Datastore that the VMware vCenter OVF Template Virtual Machine Will Use.
Choose your provisioning preference. I won’t tell you which one to use. It appears that everybody has a strong opinion on which to choose.

Select the Virtual Network that the VMware vCenter Appliance Will Use.
Choose the virtual network adapter that you will use for this virtual machine.

Review the VMware vCenter Appliance OVF Template Deployment Settings.
Review your choices made in the previous pages above. Then click the “Finish” button.

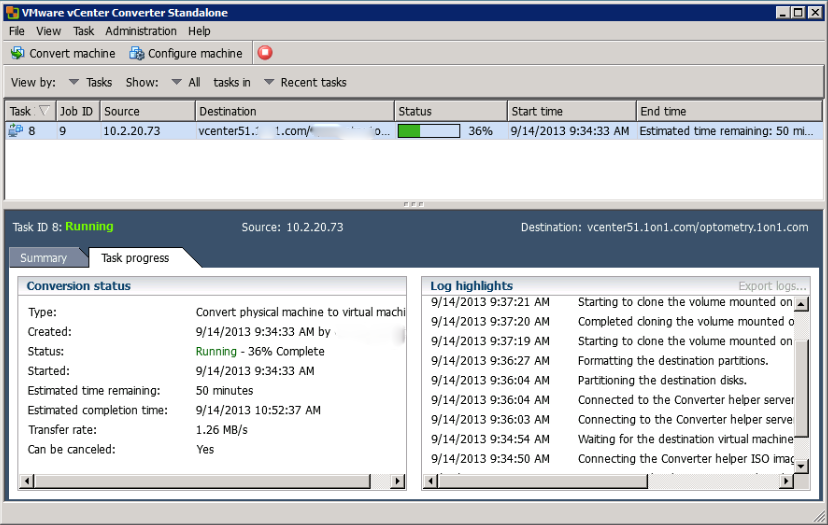
Monitor the Progress of the VMware vCenter Appliance OVF Template Deployment.
Watch the progress bar as it deploys the vCenter appliance template into a virtual machine.

The VMware vCenter Appliance OVF Template Deployment is Complete.
vCenter appliance virtual appliance is Complete!

Step 3 – Startup vCenter Appliance Virtual Machine

Startup the VMware vCenter Appliance Virtual Machine.
Power up the vCenter appliance virtual machine that you just deployed, then launch the virtual console.

The VMware vCenter Appliance Virtual Machine is Started.
Wait until the vCenter virtual appliance boots, then follow the instructions that it lists. The basic idea is to browse to the URL given and complete the installation there.
Step 4 – Login with Browser and Configure

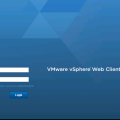
Login to the VMware vCenter Appliance Virtual Machine Through a Browser.
Using your browser, browse to the VMware vCenter Server Appliance that you deployed in step 1 and booted in step 2 above.
The userid / password should be:
root / vmware

Accept the EULA for the VMware vCenter Appliance.
Accept the EULA –that is if you agree with it.

Configuring the VMware vCenter Virtual Appliance with Default Settings.
As we are installing a brand new VMware vCenter Appliance, we will choose the “Configure with default settings” option. Choose Next.

Watch the Progress of the VMware vCenter Virtual Appliance Configuration
Watch the progress as the vCenter Server Appliance is configured.

The VMware vCenter Appliance Configuration is Complete
Configuration complete!
At this point, you are ready to use the vCenter appliance, but I would suggest to make at least two changes: Change the root password, and set a static IP address.

Change the VMware vCenter Appliance Administrator Password
First, change the root password on the Admin tab…

Set a Static IP Address for the VMware vCenter Virtual Appliance
Now set a static IP Address from the Network tab…
Step 5 – Login to the vCenter with vSphere

Login to the VMware vCenter Virtual Appliance
Your VMware vCenter Server Appliance should be ready for you to login and manage.
Launch your vSphere client, and login using the root password that you likely set above in step 4.
After logging in, I would add the physical esxi hosts that we will manage with this VMware vCenter Server Appliance.
I have been using VMware vCenter Server Appliances consistently for the last 2 years and have loved the simplicity of having the opportunity of having it in a virtual machine and eliminating the need for another Microsoft Windows Server license.
Latest posts by Jeff Staten (see all)
- Configure Your HP Procurve Switch with SNTP - May 5, 2015
- Configuring HP Procurve 2920 Switches - May 1, 2015
- Troubleshooting Sendmail - November 28, 2014