Once you have your VMware private cloud system all set up, you will likely want to convert any physical machines that you have to virtual machines on your cloud system. To help you with this task, VMware created their VMware vCenter Converter Standalone. The VMware converter will login to your Windows or Linux system and copy the entire machine over into a new virtual machine on a host maintained by your vCenter.

Below is a documented example of converting a CentOS linux system from physical to virtual using the VMware Converter.
Download the VMware vCenter Converter
To get the converter, you can download the latest 5.1 VMware vCenter Converter using this link: Download the VMware vCenter Converter
P2V Conversion Using VMware vCenter Converter Standalone
Once you have downloaded and installed the VMware vCenter converter, you can begin to convert a physical machine. Launching the converter will give you the following screen.

Launch the VMware Vcenter Converter
Click on the “Convert Machine” button to begin conversion.
Enter Source Credentials

Enter Credentials to the Source System into the VMware vCenter Converter
To begin the conversion process, we now need to enter connection information and credentials so the VMware vCenter Converter can login and have rights to pull files from the source system.
Define the Destination vCenter
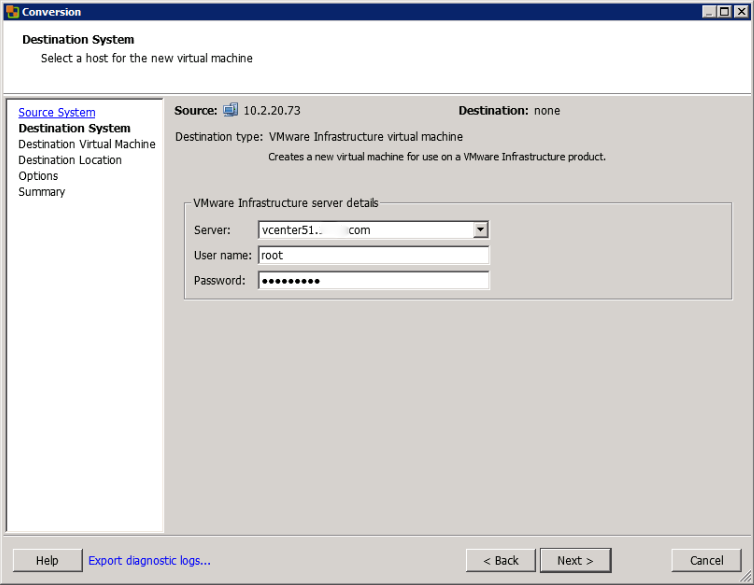
Enter Credentials to Connect to the Destination vCenter System
Next, enter in the credentials to the vCenter that manages the esxi host that will host the destination virtual machine.
Define the Destination vCenter Cloud

Select the Cloud that the virtual machine will be included in.
Choose the cloud under which we want to add our virtual machine.
Choose the Destination Host
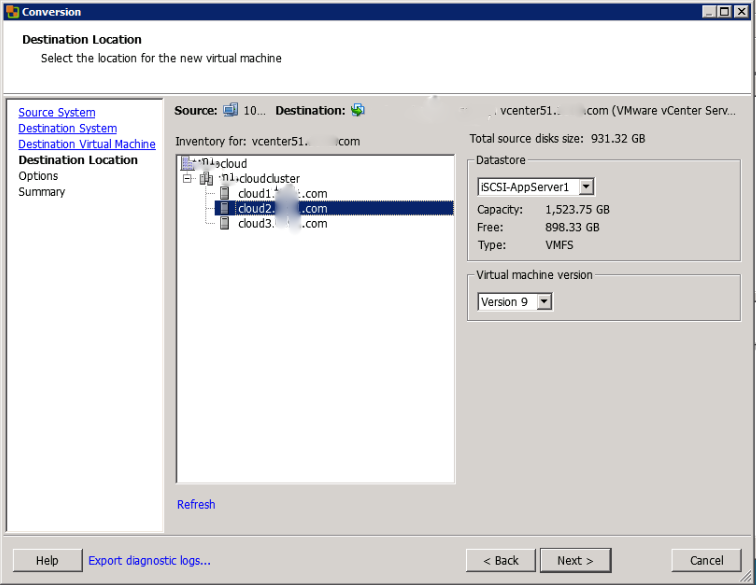
Select VMware Host, Datastore, and Virtual Machine Version
Choose the Host and datastore where you want to place the virtual machine. Choose the Virtual machine version.
Setup the Disk Layout
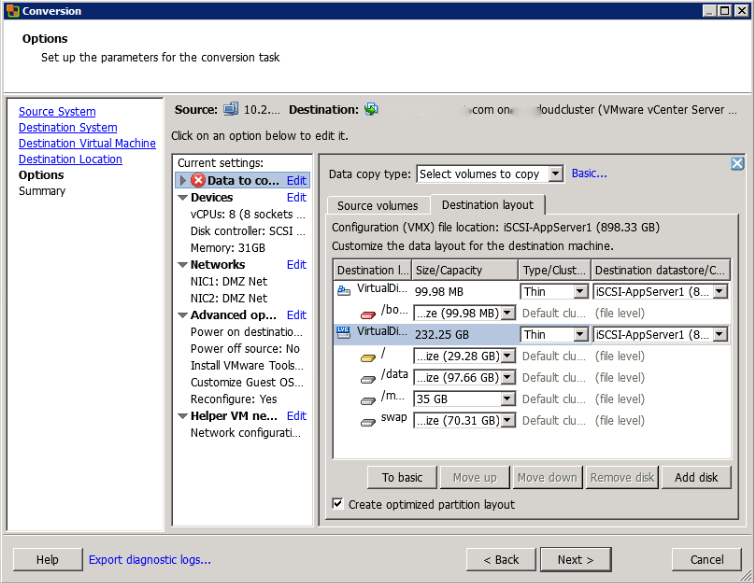
Define the VMware Disk Layout
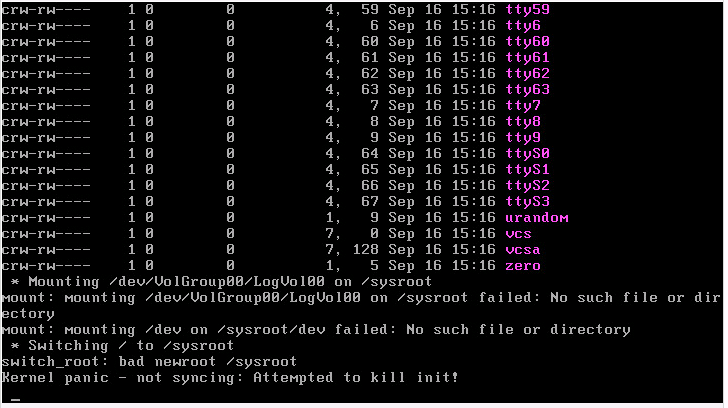
Perhaps the most important part of the whole conversion definition setup is defining the disk layout. If you are converting a linux system, then you will want to check if you are using logical volumes. See the article: Kernel Panic Using VMware vCenter Converter Standalone for more information if you do, as it will likely fail unless you choose the advanced blue link in the top right corner and then the “To basic” button. Choose “thin” rather than “thick” disk type and then the “next” button.
Choose Core Count and the Amount of Memory
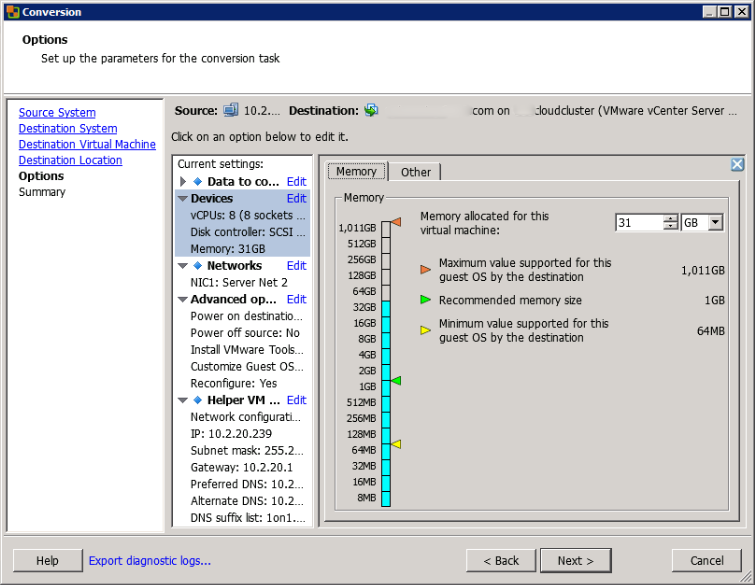
Designate the Proper Amount of Memory and CPU Cores
Designate the memory and cpu cores to assign to the virtual machine.
Define the Network Adapter
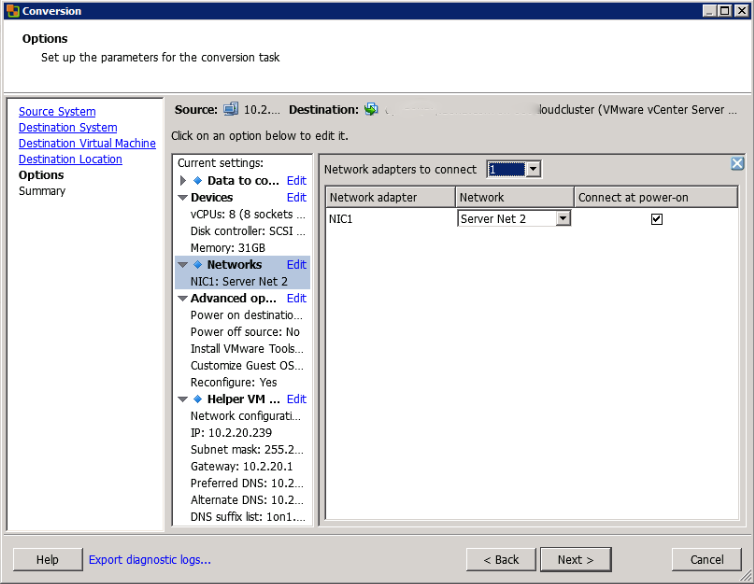
Define the Network Adapters
Define how many network adapters you want and then choose which virtual network you want the adapter to participate in.
Define Post Conversion Tasks

Define Any Post Conversion Tasks
One this page, you can define whether to turn off the source machine at completion or to power up the new virtual machine when the conversion is complete.
Define the Helper Network Configuration
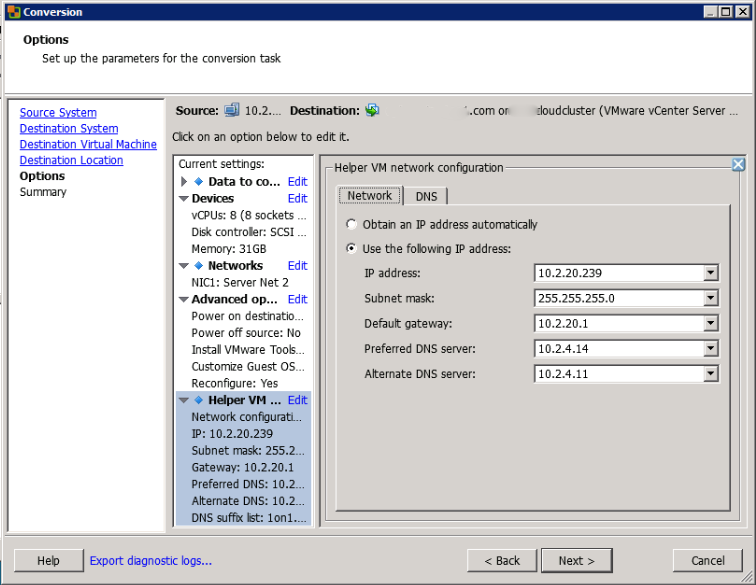
Define a Temporary IP Address for the new Virtual Machine to Use During the Conversion
Here, you need to define the helper IP address to the virtual network chosen above that the new virtual machine will use during the conversion process only. This is not a permanent assignment. When the conversion is complete, the virtual machine should have the IP address that the physical machine was using.
Review the Conversion Details
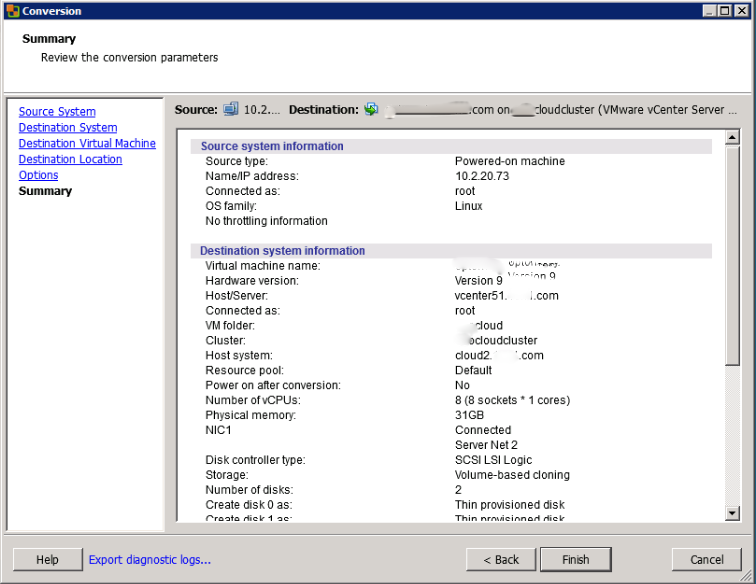
Review the Conversion Details in the VMware Converter
Next, we review all of the choices that we made above to see if there is anything that we missed. After you have reviewed everything, hit the “Finish” button.
The VMware vCenter Converter Runs the P2V Conversion
- VMware vCenter Converter
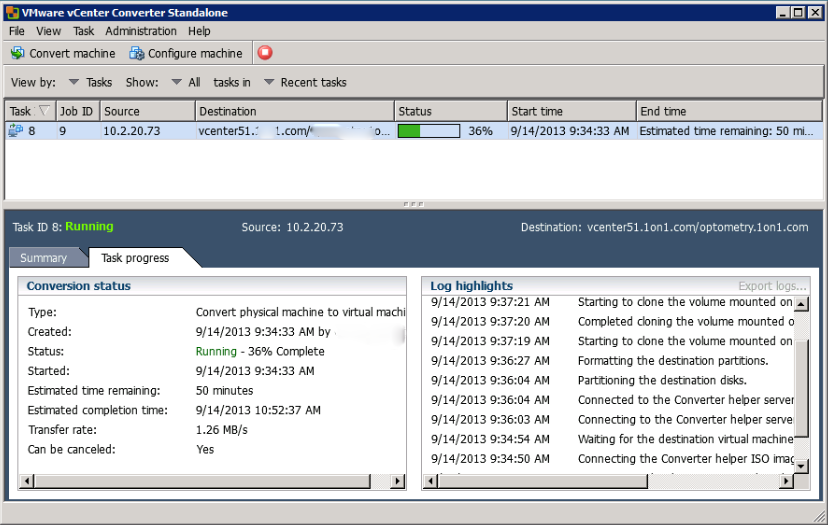
The VMware vCenter Converter Standalone Runs the P2V Conversion
The VMWare converter begins to convert the physical linux machine to a virtual machine on our cloud system.
P2V Complete

P2V Conversion is Complete Using VMware vCenter Converter Standalone
When the conversion is completed it will look like the image to the right. You are nearly done, but will want to test boot the virtual machine before you declare victory on the conversion. I have seen several conversions get to this point and still end in failure.
Test Boot Your Virtual Machine
It is now time for you to test boot your virtual machine using the vCenter vSphere or vCenter web login. Watch the console to verify that it boots without errors. If your physical machine is still up when you boot the destination machine, your virtual machine will sense it and likely pickup a DHCP address if it is configured on your network. If you run into troubles and need to troubleshoot issues, some of the issues that I have had are described in this article: Troubleshooting VMware vCenter Conversions.
Latest posts by Jeff Staten (see all)
- Configure Your HP Procurve Switch with SNTP - May 5, 2015
- Configuring HP Procurve 2920 Switches - May 1, 2015
- Troubleshooting Sendmail - November 28, 2014