In the old days, when you wanted to build a Linux DNS server, you would immediately go to Bind. More recently, however, other Open Source options have developed that store their records in SQL databases. Additionally, WebGUIs have been created to make record modification and modifications easier. For organizations that manage large amounts of domains, the addition of the WebGUI has simplified the management of the DNS for these domains. Recently, I had the opportunity to install one of these newer SQL database DNS servers (PowerDNS – Written by the Dutch company PowerDNS.COM BV) as well as an accompanying WebGUI (PowerAdmin – Written by Jorn Ekkelenkamp and Roeland Nieuwenhuis). So, as I installed, I took notes and used them to build this article on Installing Powerdns. This article will help you to Install a Complete Open Source DNS Server in Minutes.
Install Powerdns on CentOS 6
It is fairly simple to install PowerDNS on CentOS 6 as you can use yum to install the actual software. The database, in my case I am using MySQL, has to be installed outside of the actual PowerDNS software installation.
Step 1 – Install Mysql-Server
We have covered this in other articles and, of course, the steps haven’t changed:
yum install mysql mysql-server
I always edit /etc/my.cnf right away with a couple lines:
lower_case_table_names=1
max_connections=100
Setup Mysql Server to start at boot time:
# chkconfig mysqld on
# service mysqld start
# chkconfig --list mysqld
mysqld 0:off 1:off 2:on 3:on 4:on 5:on 6:off
Set the root password for MySQL Server:
# mysqladmin -u root password
Step 3 – Create MySQL database, Userid and Password for PowerDNS
$ mysql -uroot -p
Enter password:

mysql> create database powerdns;
Query OK, 1 row affected (0.00 sec)

mysql> grant all on powerdns.* to 'powerdns'@'localhost' identified by '';
Query OK, 0 rows affected (0.00 sec)
Now that we have the database created, we need to create the schema that PowerDNS needs. I pulled the PowerDNS schema creation DDL below from http://doc.powerdns.com/html/configuring-db-connection.html. You may wish to go there for an updated version just in case.
create table domains (
id INT auto_increment,
name VARCHAR(255) NOT NULL,
master VARCHAR(128) DEFAULT NULL,
last_check INT DEFAULT NULL,
type VARCHAR(6) NOT NULL,
notified_serial INT DEFAULT NULL,
account VARCHAR(40) DEFAULT NULL,
primary key (id)
) Engine=InnoDB;

CREATE UNIQUE INDEX name_index ON domains(name);

CREATE TABLE records (
id INT auto_increment,
domain_id INT DEFAULT NULL,
name VARCHAR(255) DEFAULT NULL,
type VARCHAR(10) DEFAULT NULL,
content VARCHAR(64000) DEFAULT NULL,
ttl INT DEFAULT NULL,
prio INT DEFAULT NULL,
change_date INT DEFAULT NULL,
disabled INT DEFAULT NULL,
primary key(id)
) Engine=InnoDB;

CREATE INDEX nametype_index ON records(name,type);
CREATE INDEX domain_id ON records(domain_id);

create table supermasters (
ip VARCHAR(64) NOT NULL,
nameserver VARCHAR(255) NOT NULL,
account VARCHAR(40) DEFAULT NULL,
PRIMARY KEY (ip, nameserver)
) Engine=InnoDB;
Let’s verify that we have our tables created:
mysql> show tables;
+--------------------+
| Tables_in_powerdns |
+--------------------+
| domains |
| records |
| supermasters |
+--------------------+
3 rows in set (0.00 sec)
Step 4 – Install PowerDNS Using Yum and the EPEL Repository
The latest version of PowerDNS is in the EPEL Repository which makes it very simple to install the PowerDNS packages. If you don’t have the EPEL installed yet, here are some directions for you:
# Install wget if you don't have it yet.
yum install wget
# Download the EPEL RPM
wget http://dl.fedoraproject.org/pub/epel/6/x86_64/epel-release-6-8.noarch.rpm
# Install the EPEL RPM
rpm -Uvh ./epel-release-6-8.noarch.rpm
With the EPEL repository installed, we are now ready to install the PowerDNS packages:
yum install pdns pdns-backend-mysql
After installing the PowerDNS packages, we need to edit the pdns.conf file to give PowerDNS the connection information for its database.
Edit the /etc/pdns/pdns.conf file and put these lines at the bottom:
launch=gmysql
gmysql-host=localhost
gmysql-user=powerdns
gmysql-password=mypdnspw
gmysql-dbname=powerdns
Configure PowerDNS to start at boot and start it up for the first time:
# chkconfig --list pdns
pdns 0:off 1:off 2:off 3:off 4:off 5:off 6:off
# chkconfig pdns on
# chkconfig --list pdns
pdns 0:off 1:off 2:on 3:on 4:on 5:on 6:off
# service pdns start
Starting PowerDNS authoritative nameserver: started
That should complete the installation of PowerDNS! That half of our project should be ready to go. Next, we want to install the WebGUI to manipulate the DNS records. We will install PowerAdmin.
Install PowerAdmin on CentOS Using Yum
If php hasn’t been installed on your machine, then let’s do it now:
yum -y install php-gd php-xml php-mbstring php-cli
yum -y install php php-mcrypt php-pdo php-mysql
Step 1 – Download and Install PowerAdmin CGI’s
The PowerAdmin CGI’s are maintained at github and can be downloaded easily using wget:
# cd /var/www
# wget https://github.com/downloads/poweradmin/poweradmin/poweradmin-2.1.6.tgz
# tar -xvzf ./poweradmin-2.1.6.tgz
Step 2 – Configure Apache for PowerAdmin
Make sure that your Apache server is configured for NamedVirtualHost’s and then create /etc/httpd/conf.d/poweradmin.conf file with these contents:
<VirtualHost *:80>
    ServerName <PUT_YOUR_SERVER_FQDN_HERE>
    DocumentRoot "/var/www/poweradmin-2.1.6/"
        CustomLog logs/poweradmin.com-access_log combined

    <Directory "/data/products/poweradmin-2.1.6/">
        Options FollowSymLinks MultiViews Includes ExecCGI
        AllowOverride All
    </Directory>

</VirtualHost>
Restart Apache:
# service httpd restart
Step 3 – Complete PowerAdmin Installation with Your Browser
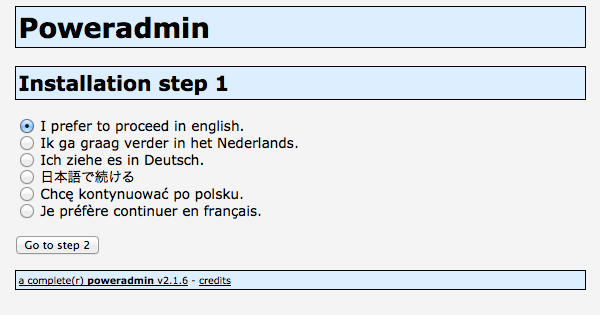
Poweradmin Installation Step 1
Go through the install screens to complete the installation of your PowerAdmin using: http://<Your-Server-s-FQDN>/install/.
You should see the Poweradmin Installation Step 1. Choose your favorite language from the list, then click the “Go to Step 2” button.

Poweradmin Installation Step 2
Step 2 will tell us that we need to be sure to have a database. We already do because we did that above.
Click the “Go to Step 3” button.
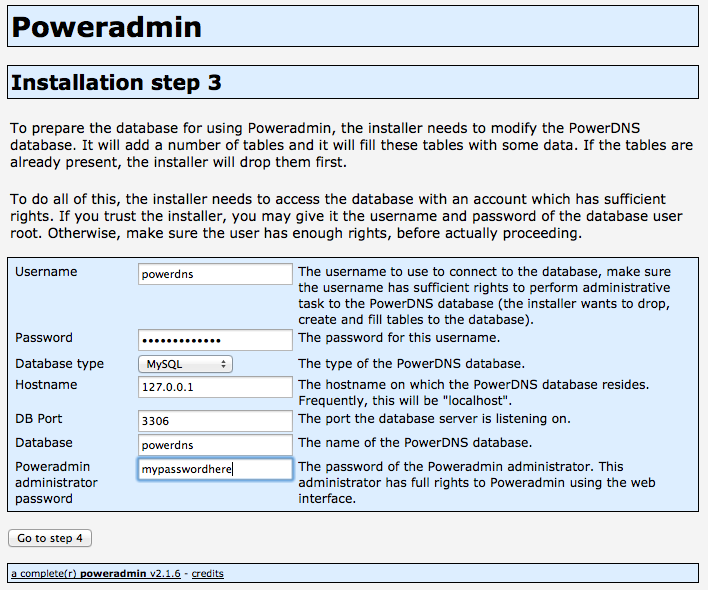
Poweradmin Installation Step 3
Step 3 – Supply connection information for Poweradmin to connect to the PowerDNS database. Poweradmin needs this connection information so that it can create its tables in the database.

Poweradmin Installation Step 4
Poweradmin – Installation Step 4
On Installation step 4, it will tell us if it completed creating its tables in the database and then it will request a userid / password for allowing it to communicate with the database on a day in and day out basis.
Populate the fields with either the same or another user.
Click the “Go to step 5” button.
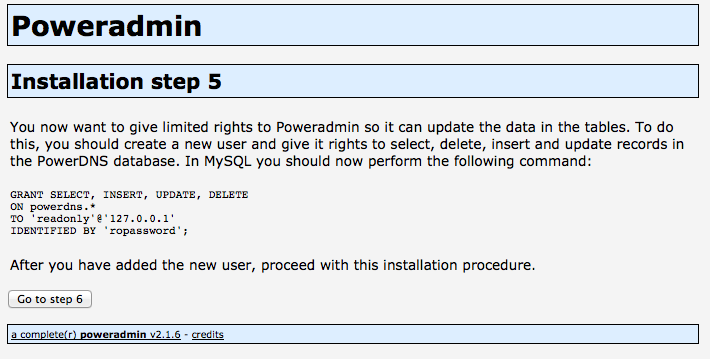
Poweradmin Installation Step 5
Step 5 is a step for you. It will give you the Grant syntax for you to run in your database to grant the proper rights to that user.
Perform the sql requested and then click on the “Go to step 6” button.
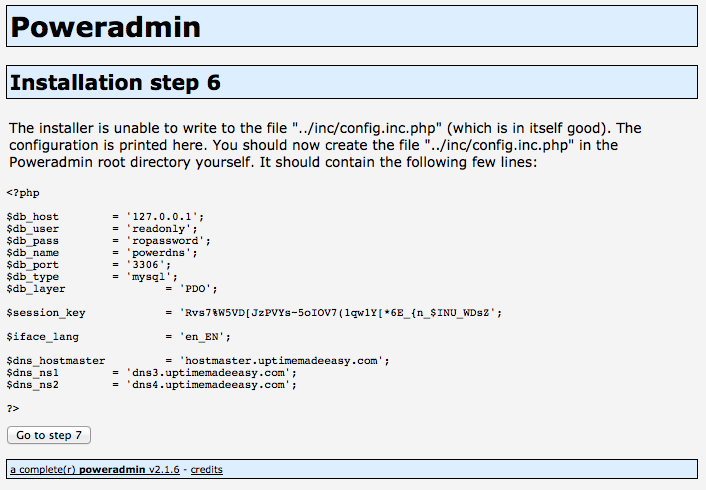
Poweradmin Installation Post Step 6
Poweradmin – Installation step 6. This is another task step for you to take. You need to edit the config.inc.php file and past in it the text it gives you.
In my case, I had to create the
/var/www/poweradmin-2.1.6/inc/config.inc.php file and insert the text that it gave me. After performing this task, click the “Go to step 7” button.
Step 7 tells us that we that we have completed the Poweradmin installation. Step 7 will also tell you to remove the install directory. I just moved it out of the directory:
# cd /var/www/poweradmin-2.1.6
# mv install $home
Poweradmin Login
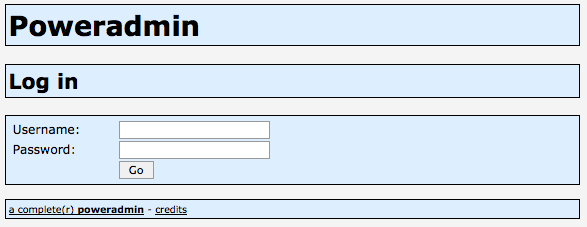
It is time to try it out. We test it out by browsing to our machine (http://fqdn-of-server/) and loginwith admin and the password we set for the admin user that we setup in Poweradmin – installation step 3 above.
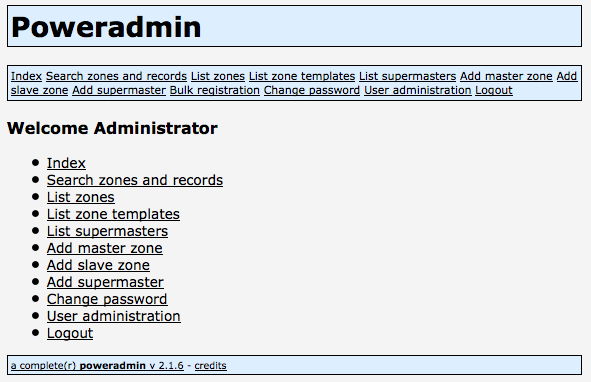
Poweradmin Main Menu
This should bring us to the main menu of Poweradmin.
Typically at this point, we will want to Add a master zone for one of our domains.
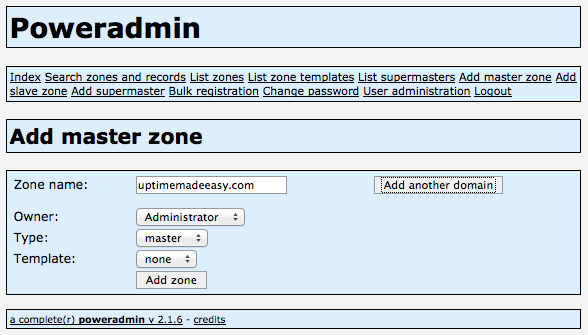
Poweradmin Add Master Zone
We add our first master domain by clicking the “Add master zone” link and completing the “Add master zone” worksheet and hitting the “Add zone” button.
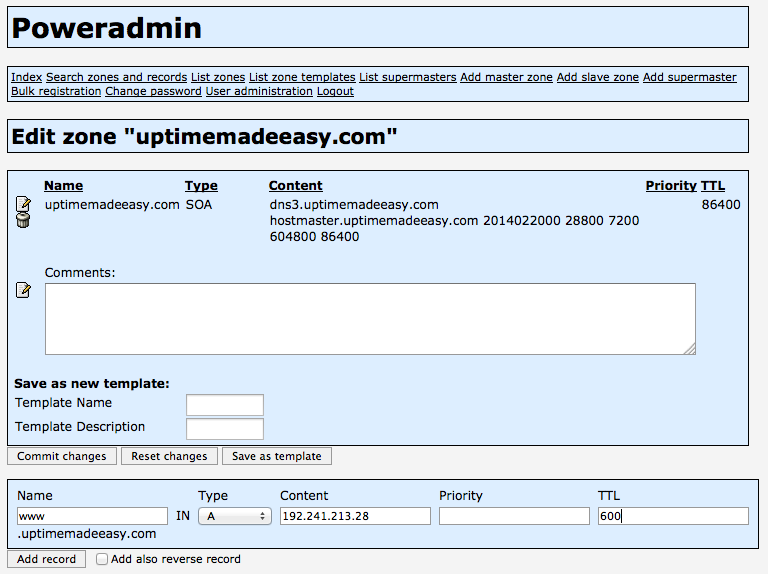
Poweradmin Create DNS Records
We can add individual DNS records by going to the “list zones” page and then clicking the paper/pencil image to the left of the zone/domain name.
Testing our New PowerDNS DNS Server
Finally at the end of the day, we want to verify that our DNS server is working and responsive to our requests for DNS lookups. The simplest method of testing is to use dig, specifying the FQDN of our new server and the record that we are looking for that our DNS server is now authoritative for:
dig @<FQDN-of-new-DNS-Server> <Host-to-lookup>
$ dig @dns3.uptimemadeeasy.com www.uptimemadeeasy.com
; <<>> DiG 9.8.3-P1 <<>> @dns3.uptimemadeeasy.com www.uptimemadeeasy.com
; (1 server found)
;; global options: +cmd
;; Got answer:
;; ->>HEADER< ;; flags: qr aa rd; QUERY: 1, ANSWER: 1, AUTHORITY: 0, ADDITIONAL: 0
;; WARNING: recursion requested but not available

;; QUESTION SECTION:
;www.uptimemadeeasy.com. IN A

;; ANSWER SECTION:
www.uptimemadeeasy.com. 600 IN A 192.241.213.28

;; Query time: 35 msec
;; SERVER: 198.199.112.182#53(198.199.112.182)
;; WHEN: Thu Feb 20 10:16:03 2014
;; MSG SIZE rcvd: 56
Finally, we need to go to our registrar and tell it to use our new DNS server for name resolution:
|
mydomain.com
|
Nameserver (NS)
|
Default
|
FQDN-of-DNS-Server
|
With that, we have installed a full open-source DNS server, with WebGUI that you can use to manage all of your DNS records.
Latest posts by Jeff Staten (see all)
- Configure Your HP Procurve Switch with SNTP - May 5, 2015
- Configuring HP Procurve 2920 Switches - May 1, 2015
- Troubleshooting Sendmail - November 28, 2014


i have follow the instruction , but in installation step 4 it show
Updating database… Unable to connect to the database server. Please report the problem to an Administrator.
i check the folder and file permission is group 20 and owner 501, is this cause the problem?
John,
I suspect that there was an issue in creating the userids or in your /etc/pdns/pdns.conf database configuration settings.
Please review these items in your pdns.conf file and make sure that they are correct.
launch=gmysql
gmysql-host=localhost
gmysql-user=powerdns
gmysql-password=mypdnspw
gmysql-dbname=powerdns
If that doesn’t resolve the issue, try to connect using mysql command line: -p -h etc….
mysql -u
Prove that you have the proper settings and that mysql is up and running on the hostname and port you mention.
Jeff
This is an excellent article. Although i had some difficulties, i managed to install Powerdns and {oweradmin on my Centos 7 server by combining this good tutorial and the one i found from lxer.com : https://www.rosehosting.com/blog/install-powerdns-and-on-a-centos-7-vps/