If you have worked with Linux or any version of Unix for a while, then you are likely aware of the diff command. But you may not be aware of some of the siblings commands of diff and some of the more cool things that can be done with diff itself.
First, let’s discuss how I use the Linux diff Command to find and fix differences in files.
Use Diff to Compare Versions of a Configuration File
Let’s imagine a fairly common situation where we are planning to edit a configuration file such as the nginx.conf, my.cnd, sshd_config, or the httpd.conf file. We typically backup the file. Typically, we would backup the file so that we could put it back in place in the event that our changes didn’t work out so well. Afterwards, using diff is an excellent way to review our changes.
Let’s imagine that we have a file with some text like the following:
$ cat file1
line1
line2
line3
line4
line5
line6
line7
line8
line9
line10
And let’s imagine that we have another file, or rather a copy of the file that has been updated a bit.
$ sed 's/line6/some changes here/g' file1 > file2
$ cat file2
line1
line2
line3
line4
line5
some changes here
line7
line8
line9
line10

(And let's add another change)

$ echo "line11" >> file2
We can now use the diff command to review the changes that have been made. The “-y” option allows us to compare the files side by side and to see the changes.
Example: We will compare two files side by side using the diff command.
$ diff -y file1 file2
line1                                line1
line2                                line2
line3                                line3
line4                                line4
line5                                line5
line6                              | some changes here
line7                                line7
line8                                line8
line9                                line9
line10                               line10
                                   > line11
By the way, the “sdiff <file1> <file2>” command gives us the same output as “diff -y <file1> <file2>”. The changed line is marked with the “|” and the new line is marked with the “>”.
Sometimes, the files are so long that it is hard to see the changes amongst all of the lines. In this case, we can run diff on the files without any options to see just the changes from one file to another.
Example: Using diff to find only the differences in two files.
$ diff file1 file2
6c6
< line6
---
> some changes here
10a11
> line11
The lines in the output is the ed command that would convert file1 to file2. in this case, line 6 in the first file saw a change to line 6 in the second file. This is followed by the lines that show the actual changes. The lines in the first file are marked with a “<” while the lines from the second file are marked with a “>”. The second change (the additional line) is marked with the 10a11 showing that there is an additional line.
Diff and Unified Output
The diff command can also show the changes in unified output using the “-u” option.
Example: Displaying the unified output differences between 2 files
(First, before we run the unified diff, let's get some information about the files)

$ ls -lh
total 8.0K
-rw-rw-r-- 1 mary mary 61 Nov  6 22:53 file1
-rw-rw-r-- 1 mary mary 80 Nov  7 00:00 file2


(Now, let's run the unified diff.)
$ diff -u file1 file2
--- file1    2014-11-06 22:53:21.365002606 -0500
+++ file2    2014-11-07 00:00:04.078002667 -0500
@@ -3,8 +3,9 @@
 line3
 line4
 line5
-line6
+some changes here
 line7
 line8
 line9
 line10
+line11
The first two lines (or header) tell us about the files themselves. We see the file name, Then we see the timestamp of the two files followed by the offset from GMT. This header can be changed by using the –label=label option.
After the header comes the “hunk” which is delimited by the @@’s. The hunk will look like ‘start,count’.
After the hunk comes the actual lines. Lines with a ‘+’ show lines that have been added and lines with a ‘-‘ show lines that are removed.
All of these lines (header, hunk, data lines) can be used in the patch command to transform the first file into the second file.
Using the Patch Command
This is the point where I probably should stray for a moment from the diff command family to mention the “patch” command. The patch command can take the unified output from the diff command to transform the original file to the modified file. By the way, I had to add the patch command to my system with yum.
Example: Find the differences between 2 files and make them match.
$ cp file1 file1-orig
$ diff -u file1 file2 > differences
$ patch file1 < differences
patching file file1
$ diff file1 file2
In the example above, the patch command took the unified output from “diff -u” to make the files exactly the same again.
Fixing Files with Vimdiff
With the vim-enhanced package installed, you can also use the vimdiff to review changes and fix differences between two files with the vim editor.
$ cp file1-orig file1
$ vimdiff file1 file2
Running the vimdiff command above will look like this:
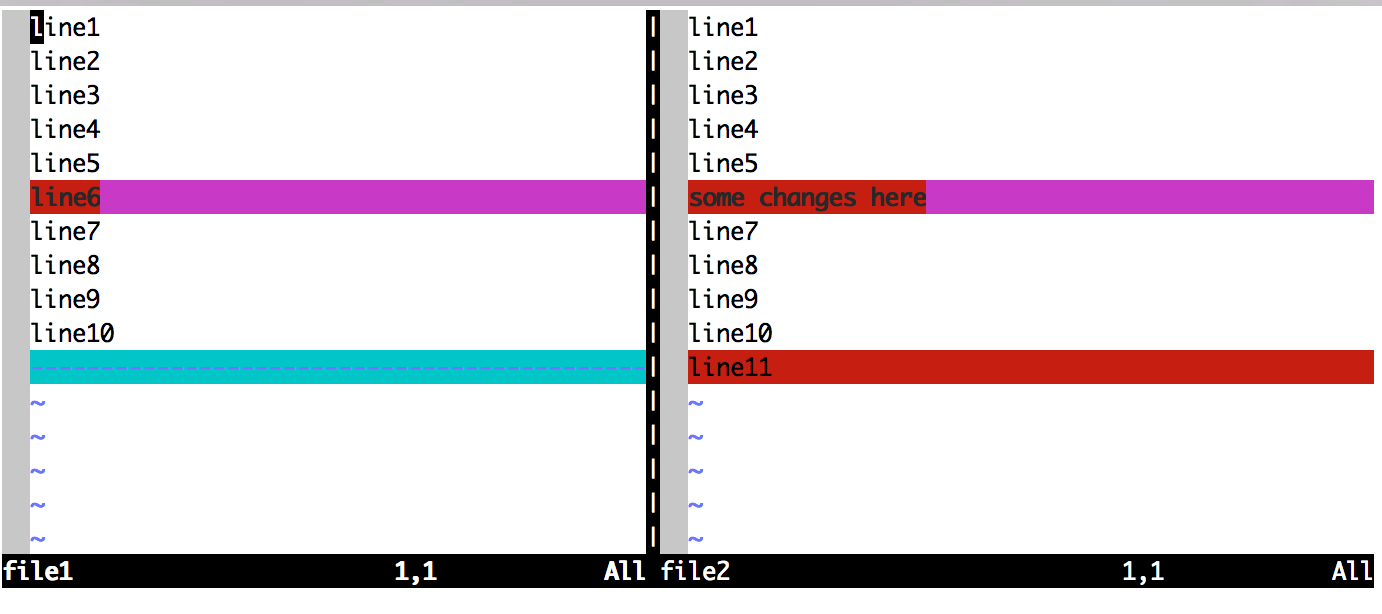
Fix Differences Between Two Files with vimdiff
The differences in the files will be highlighted and as you are in the vim editor, you can makes the changes to make them match. As you fix and eliminate the differences, the highlighting will disappear.
There are other ways to compare file differences in Linux. Gvimdiff is a graphical version of vimdiff and there are others still. If you have a favorite method for comparing files for differences, please leave a comment below.
Latest posts by Jeff Staten (see all)
- Configure Your HP Procurve Switch with SNTP - May 5, 2015
- Configuring HP Procurve 2920 Switches - May 1, 2015
- Troubleshooting Sendmail - November 28, 2014
A good visual comparison tool is “meld”.